1. Open Outlook
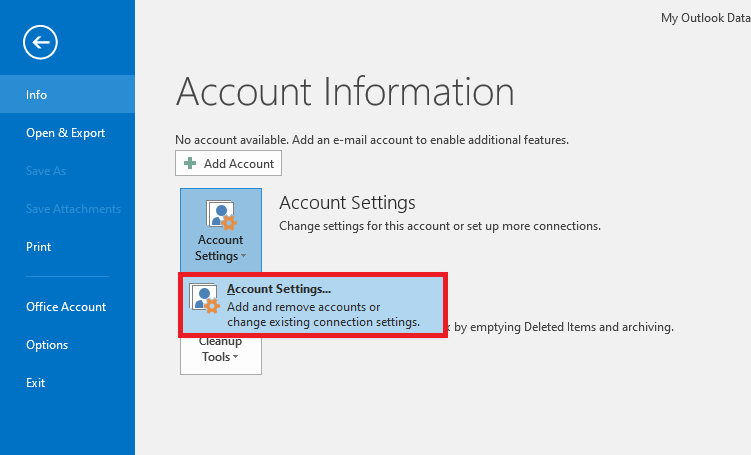
2. Click : File > Account Settings
3. Click the “Account Settings” drop-down
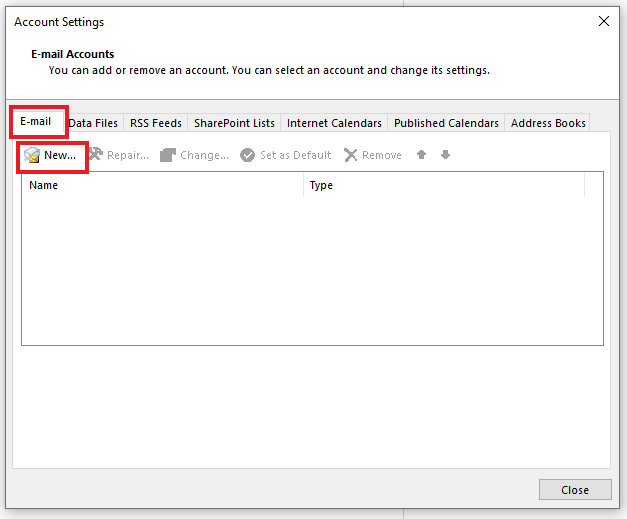
4. In the “Account Settings” window click the “E-mail” tab at the top.
5. Click the “New” button.
6. In the “Add Account” window click “Manual setup or additional server types” at the bottom and click “Next“

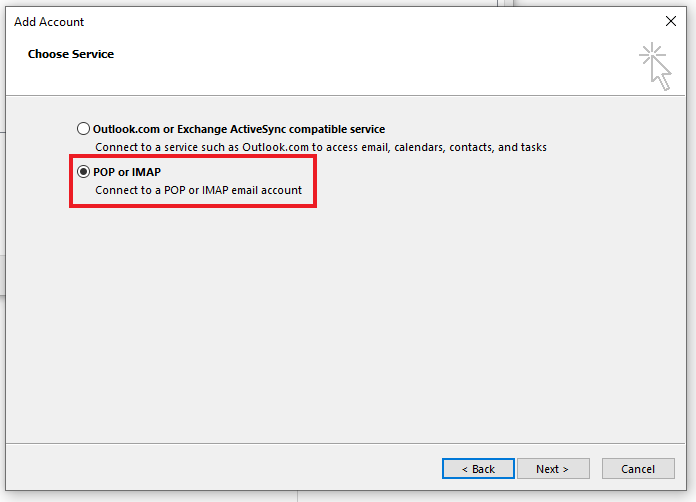
7. In the “Choose Service” window choose “POP or IMAP” and click “Next“
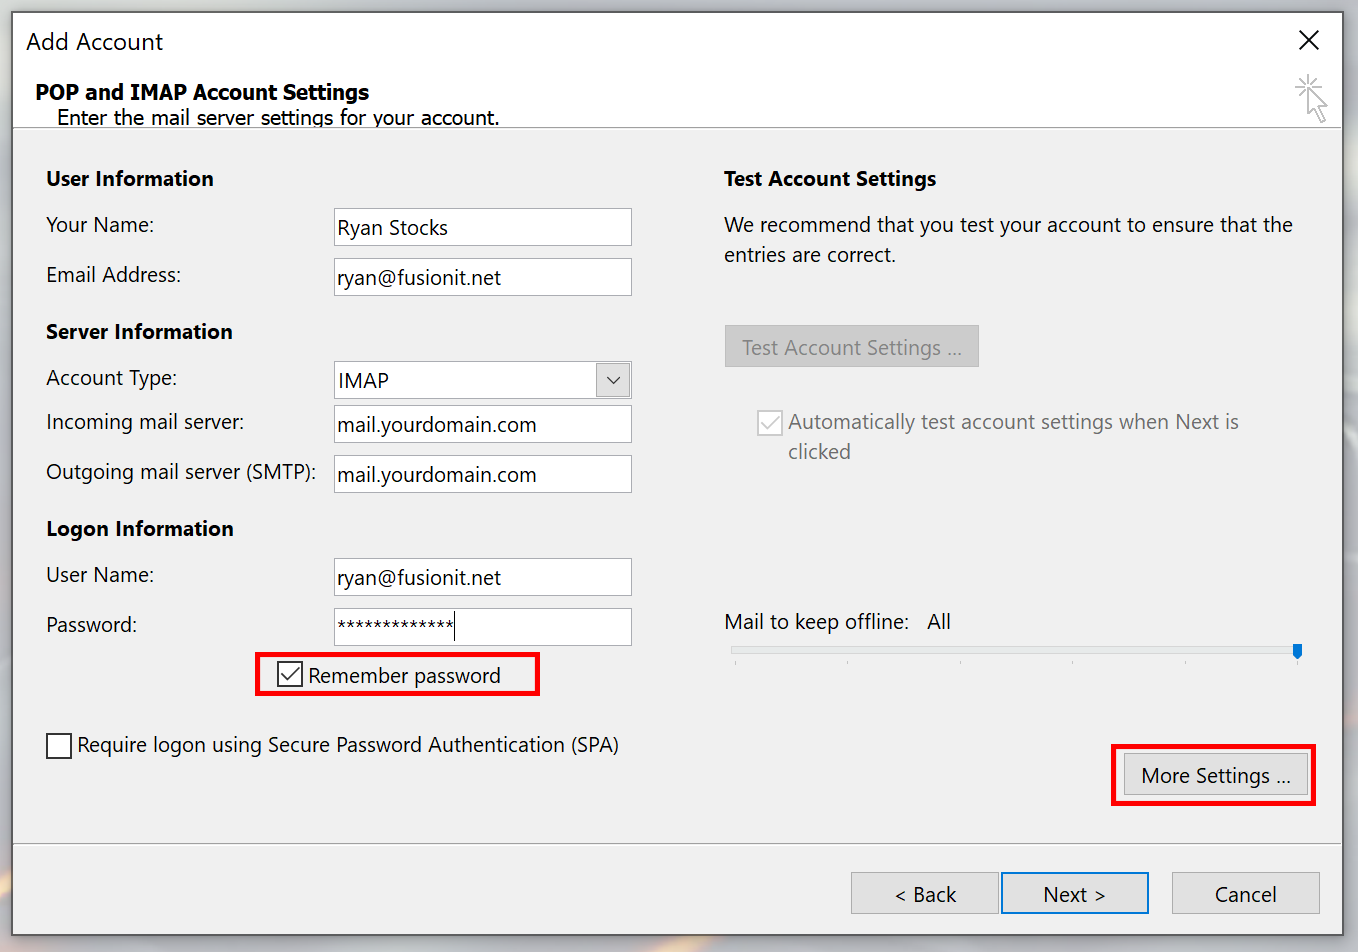
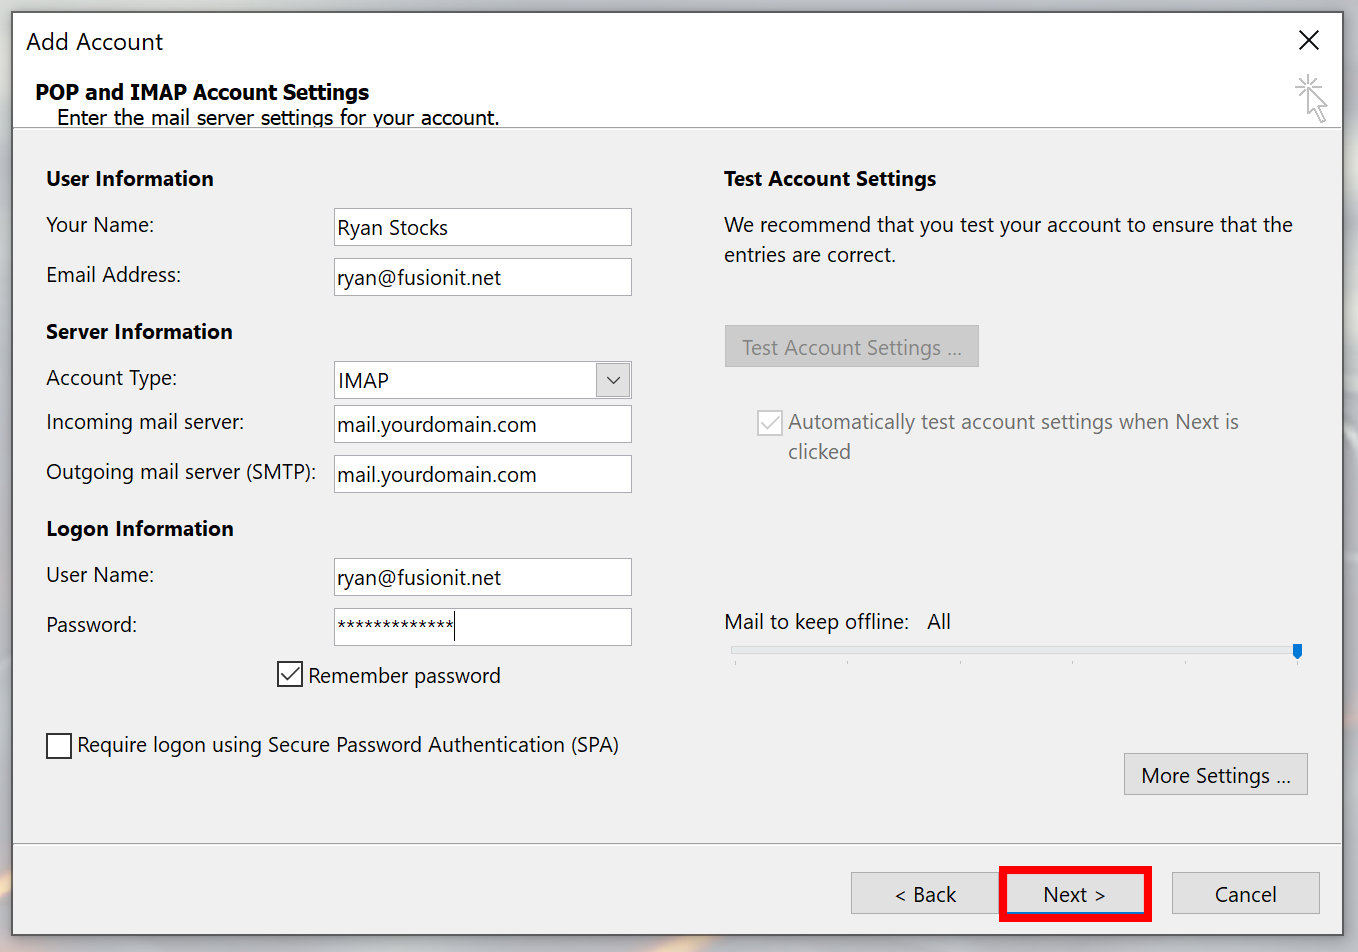
8. In the “POP and IMAP Account Settings” window use the following information for each field :
Your Name – Use your first and last name
Email Address – Enter your email address
Account Type – Choose “IMAP“
Incoming Mail Server – mail.yourdomain.com (be sure to use your own domain for this field. For example if your domain is apple.com then you would use “mail.apple.com” as your server address. Make sure “mail” is at the beginning.
Outgoing Mail Server (SMTP) – mail.yourdomain.com (Same as above)
Username – This will be your email address
Password – Use the password given to you by Fusion-Dev
Note* Make sure “Remember Password” is checked.
9. Click the “More Settings” button after filling out the form.
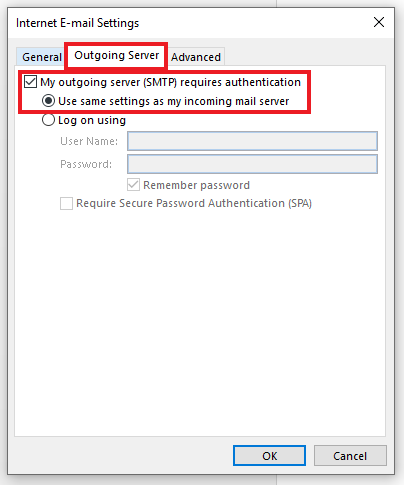
10. In the “Internet E-mail Settings” window click on the “Outgoing Server” tab and click “My outgoing server (SMTP) requires authentication“.
11. Make sure “Use same settings as my incoming mail server” is checked.
12. Click the “Advanced” tab
13. Under “Incoming Server” choose “SSL” in the drop down labeled “Use the following type of encrypted connection“.
14. Use “SSL” for the Outgoing server as well.
15. Use port “993” for the “Incoming Server (IMAP)” and port “465” for the “Outgoing Server (SMTP)“.
16. Click “Ok“

17. Click the “Next” button on the “POP and IMAP Account Settings” window.
Congratulations, your email should now be set up on Outlook!


