
1. Open IOS Settings
2. Go to Apps
3. Go to Mail
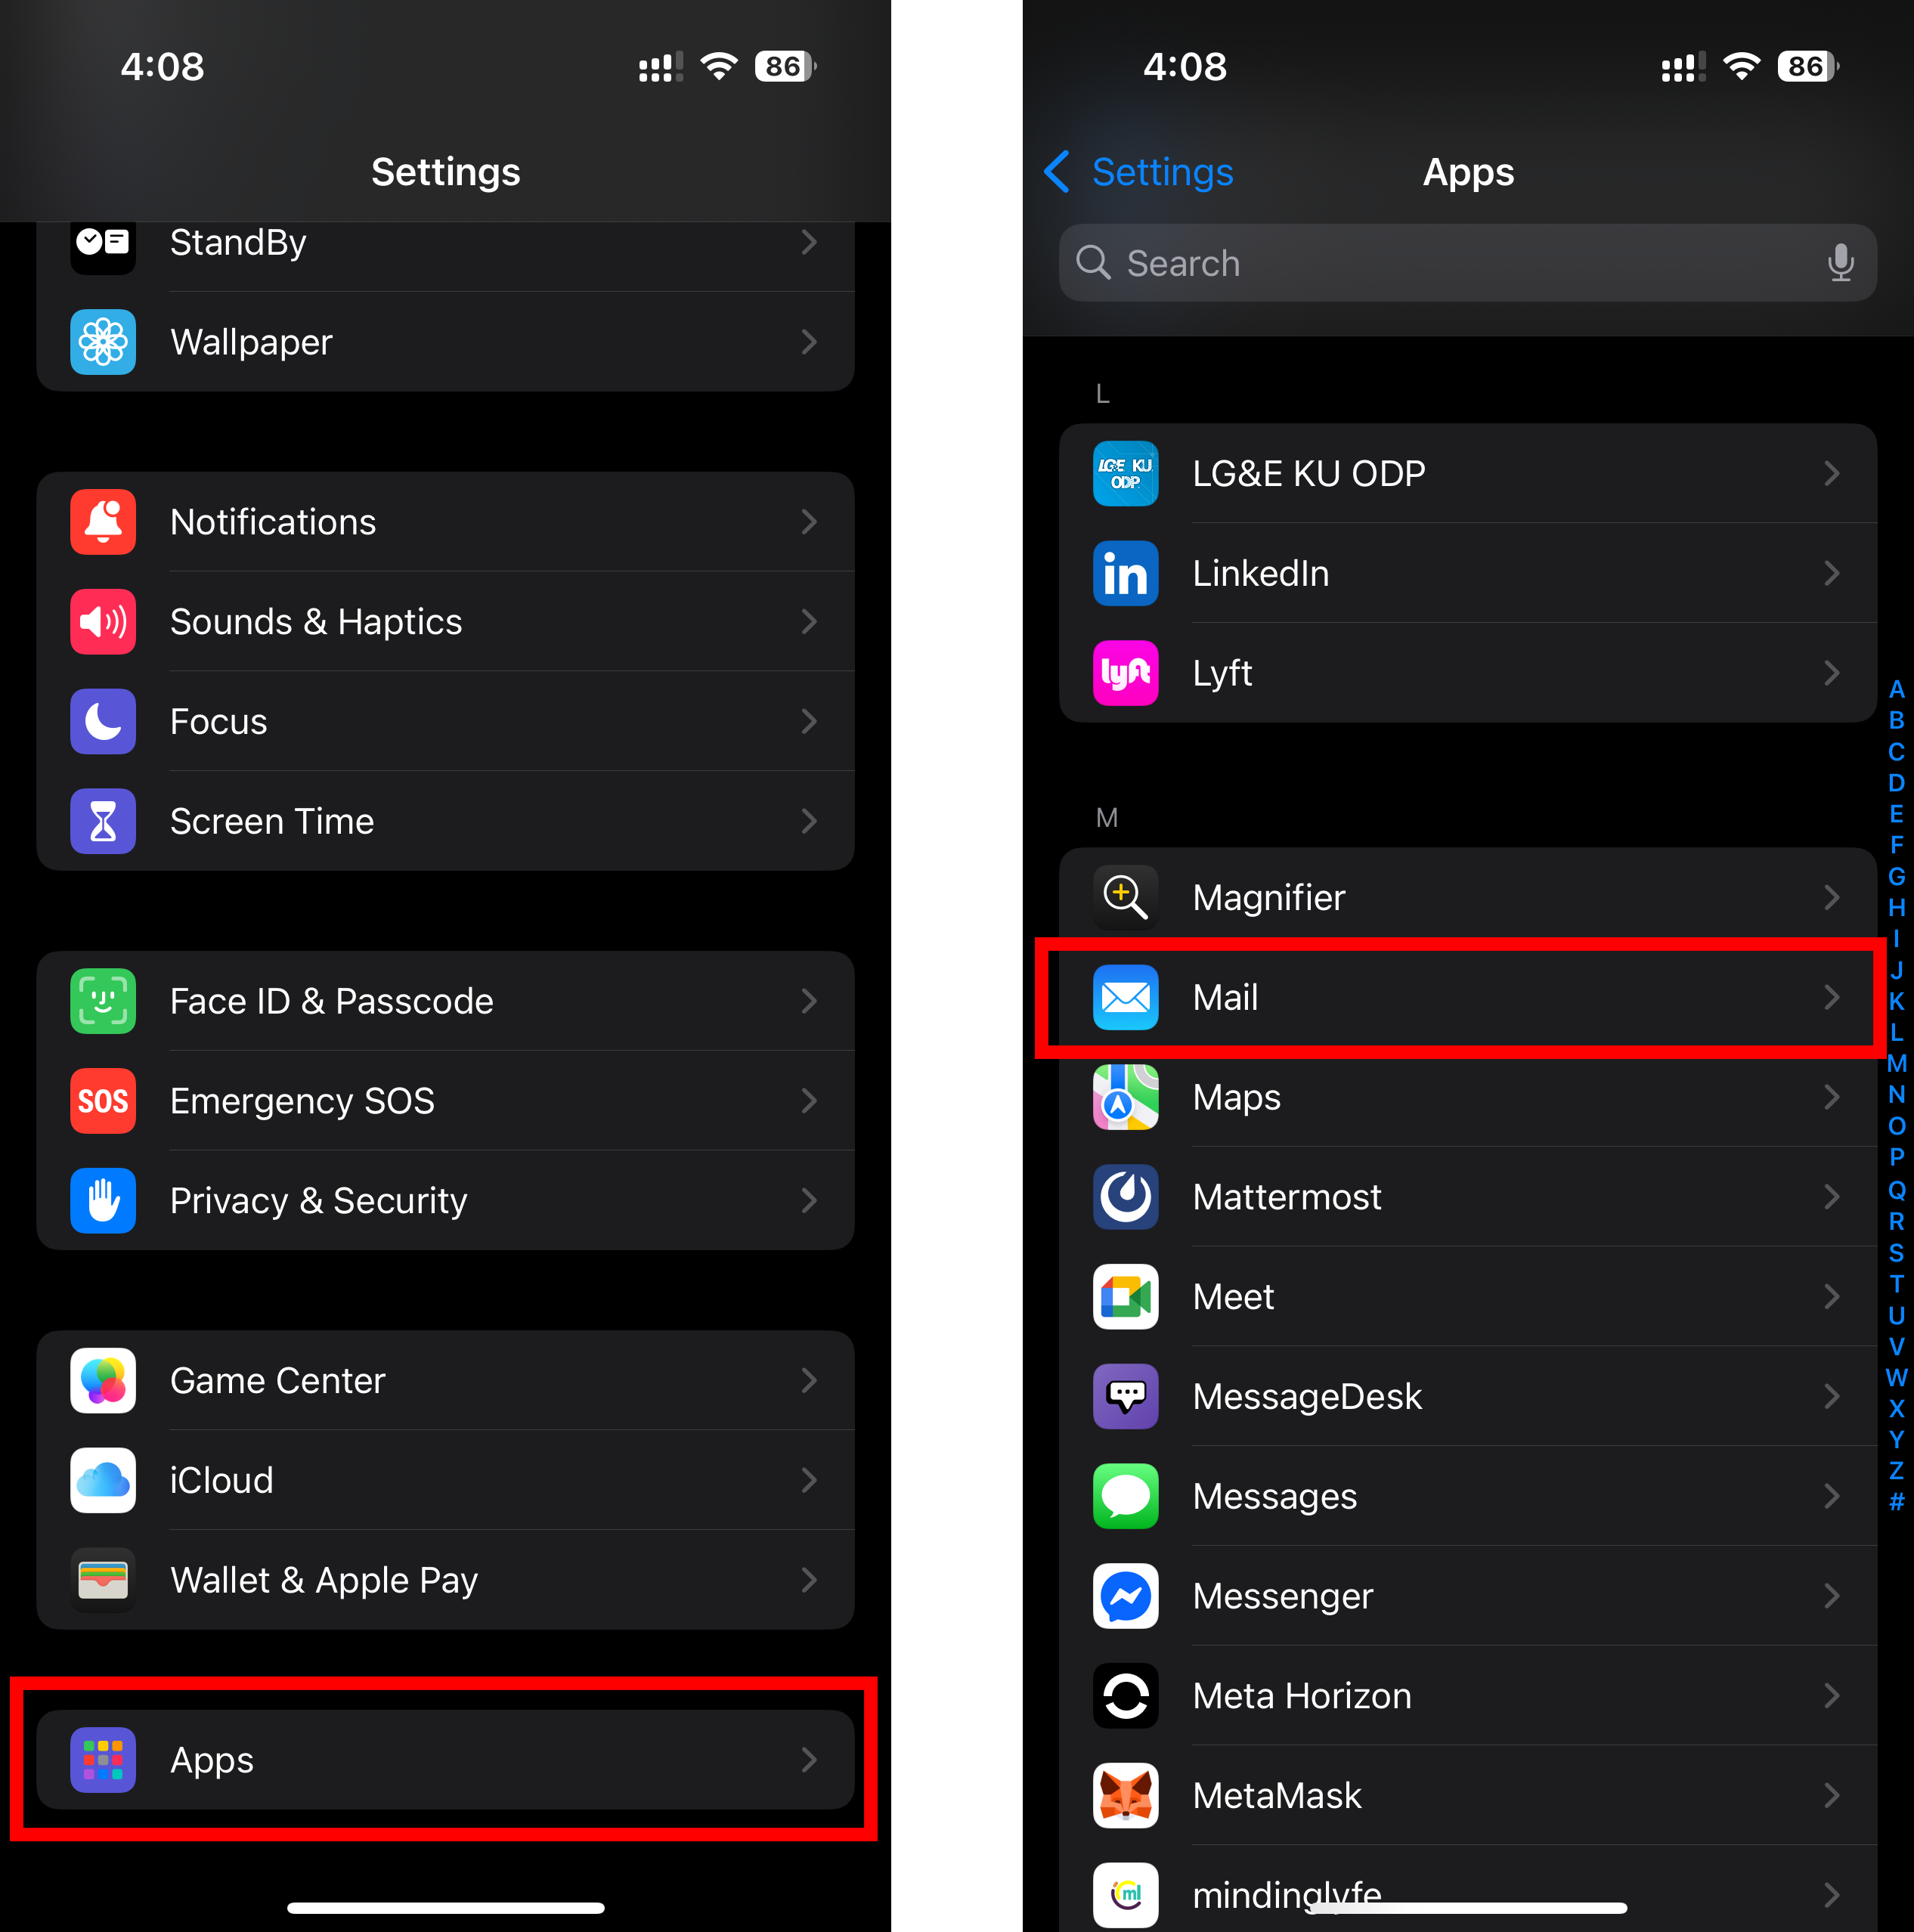
4. Choose “Mail Accounts”
5. Then Choose “Add Account”
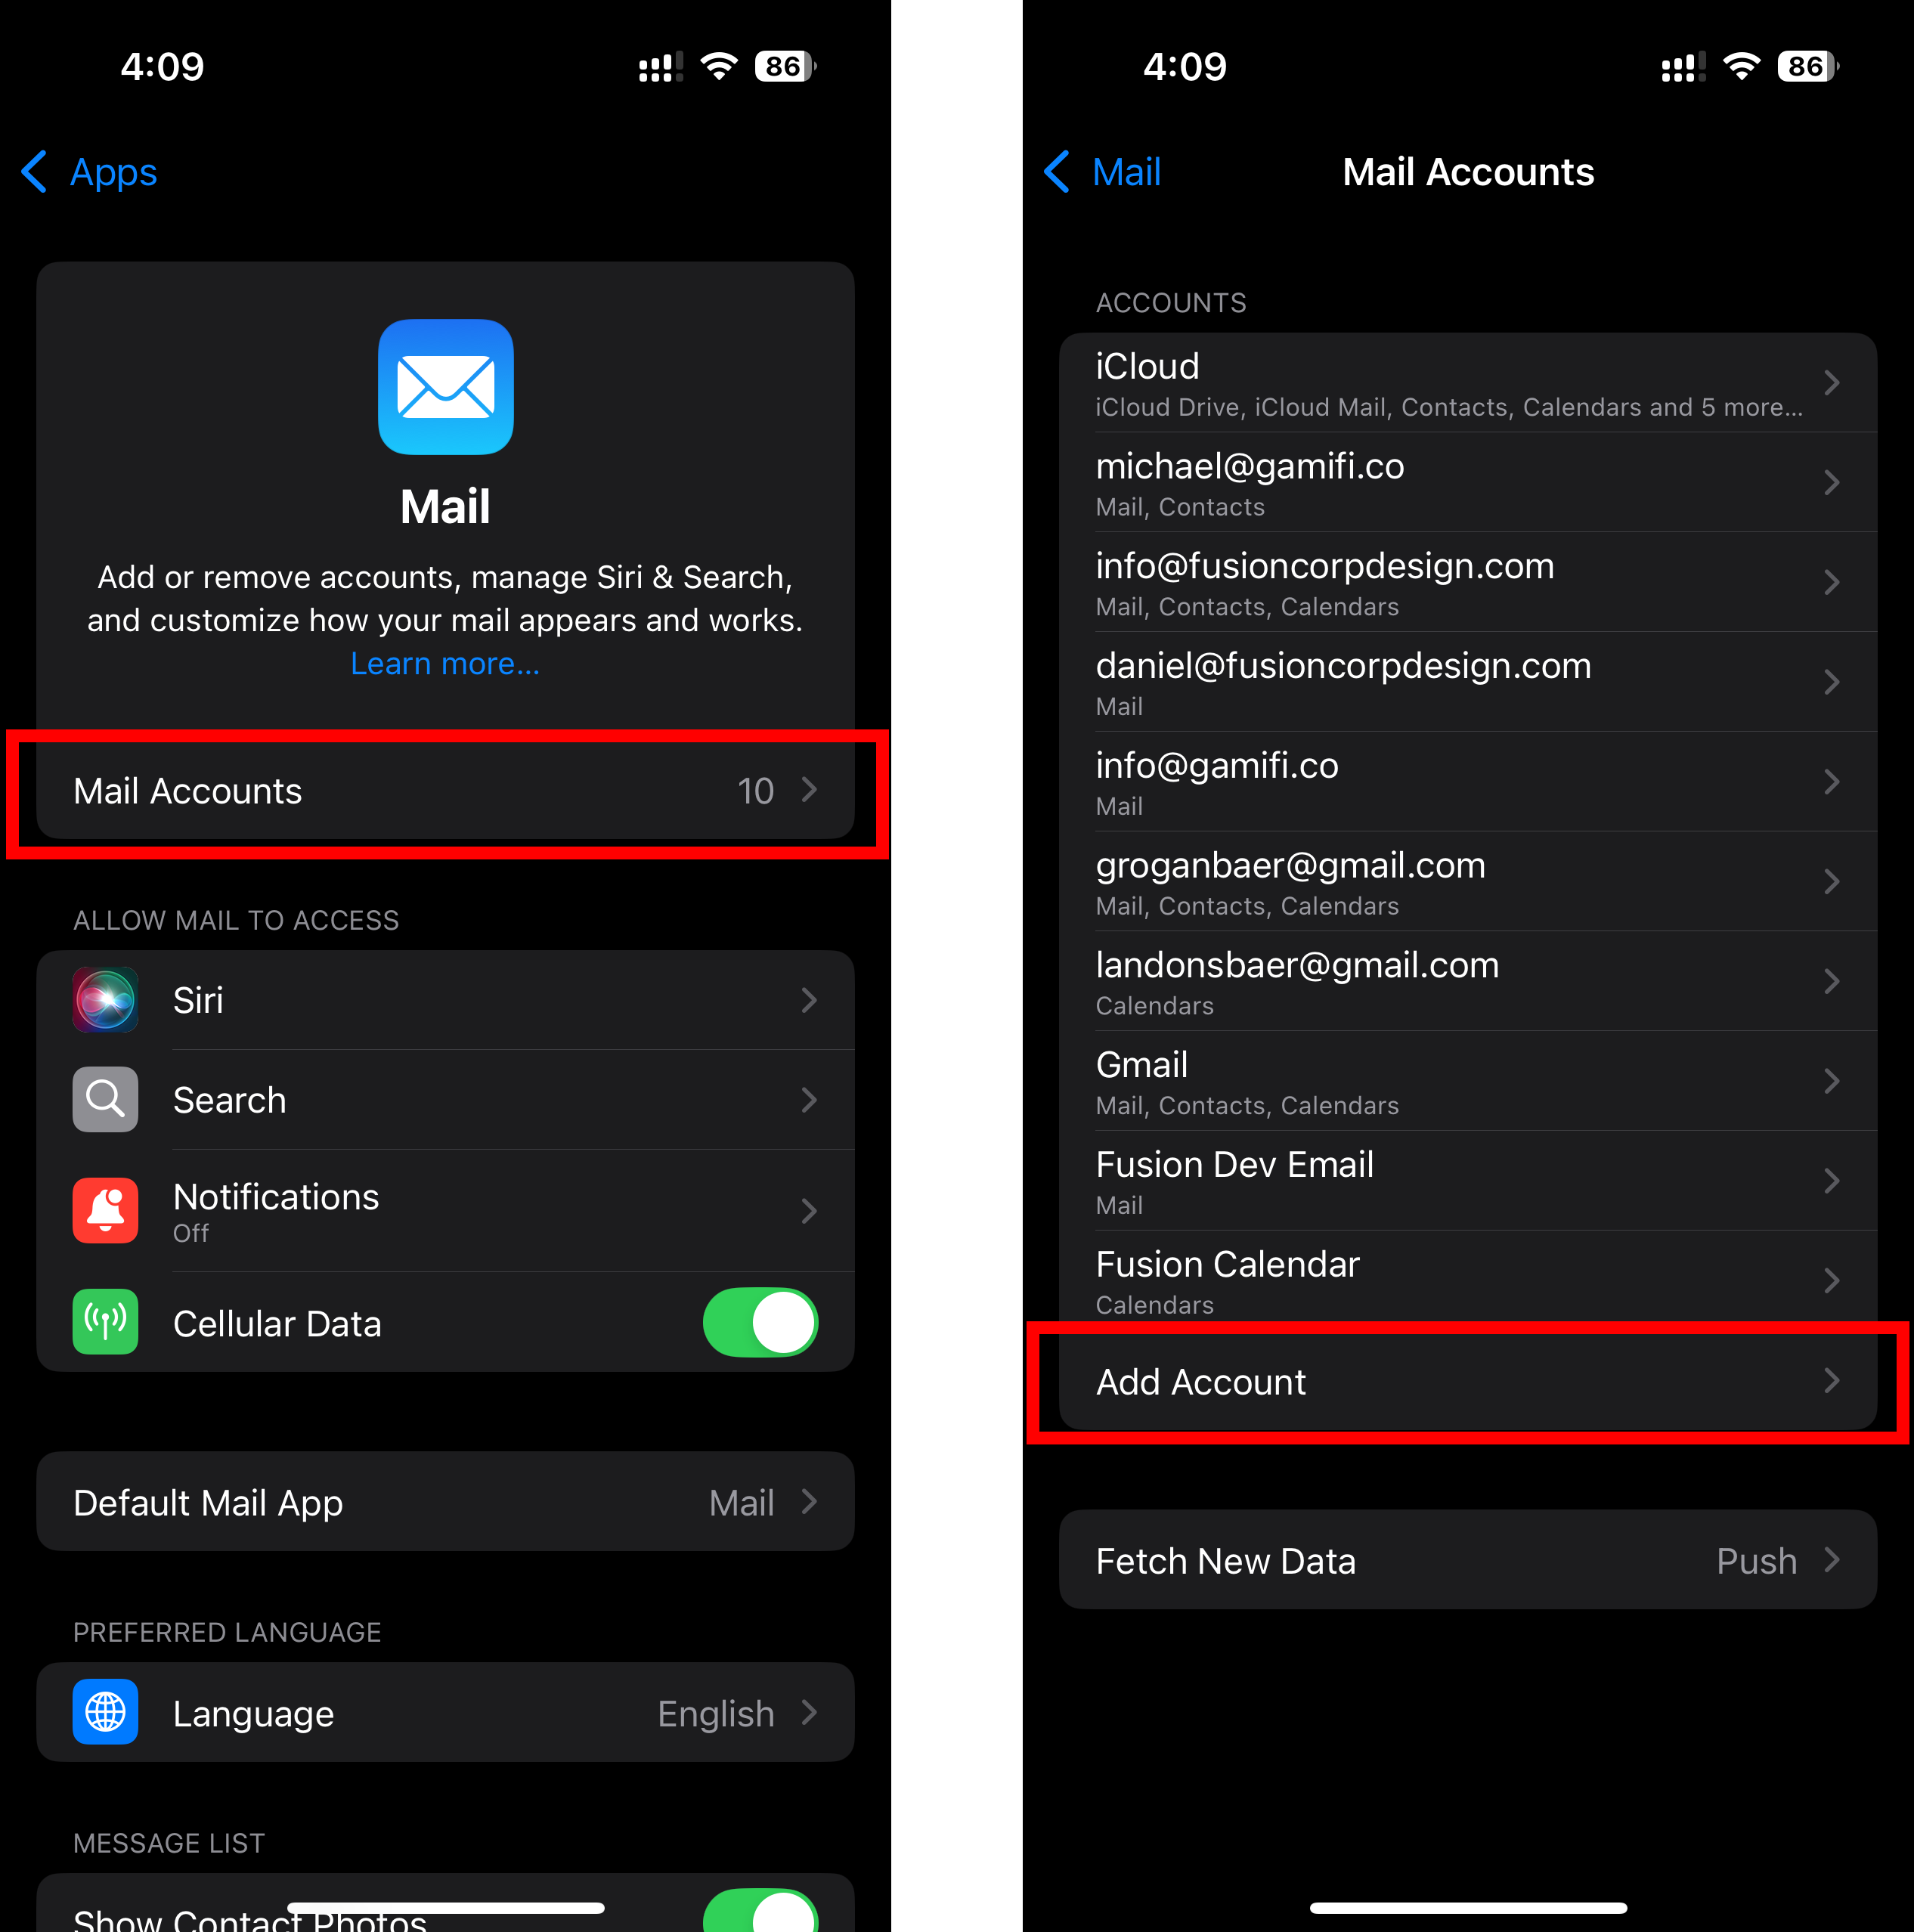
5. Choose “Add Mail Account”
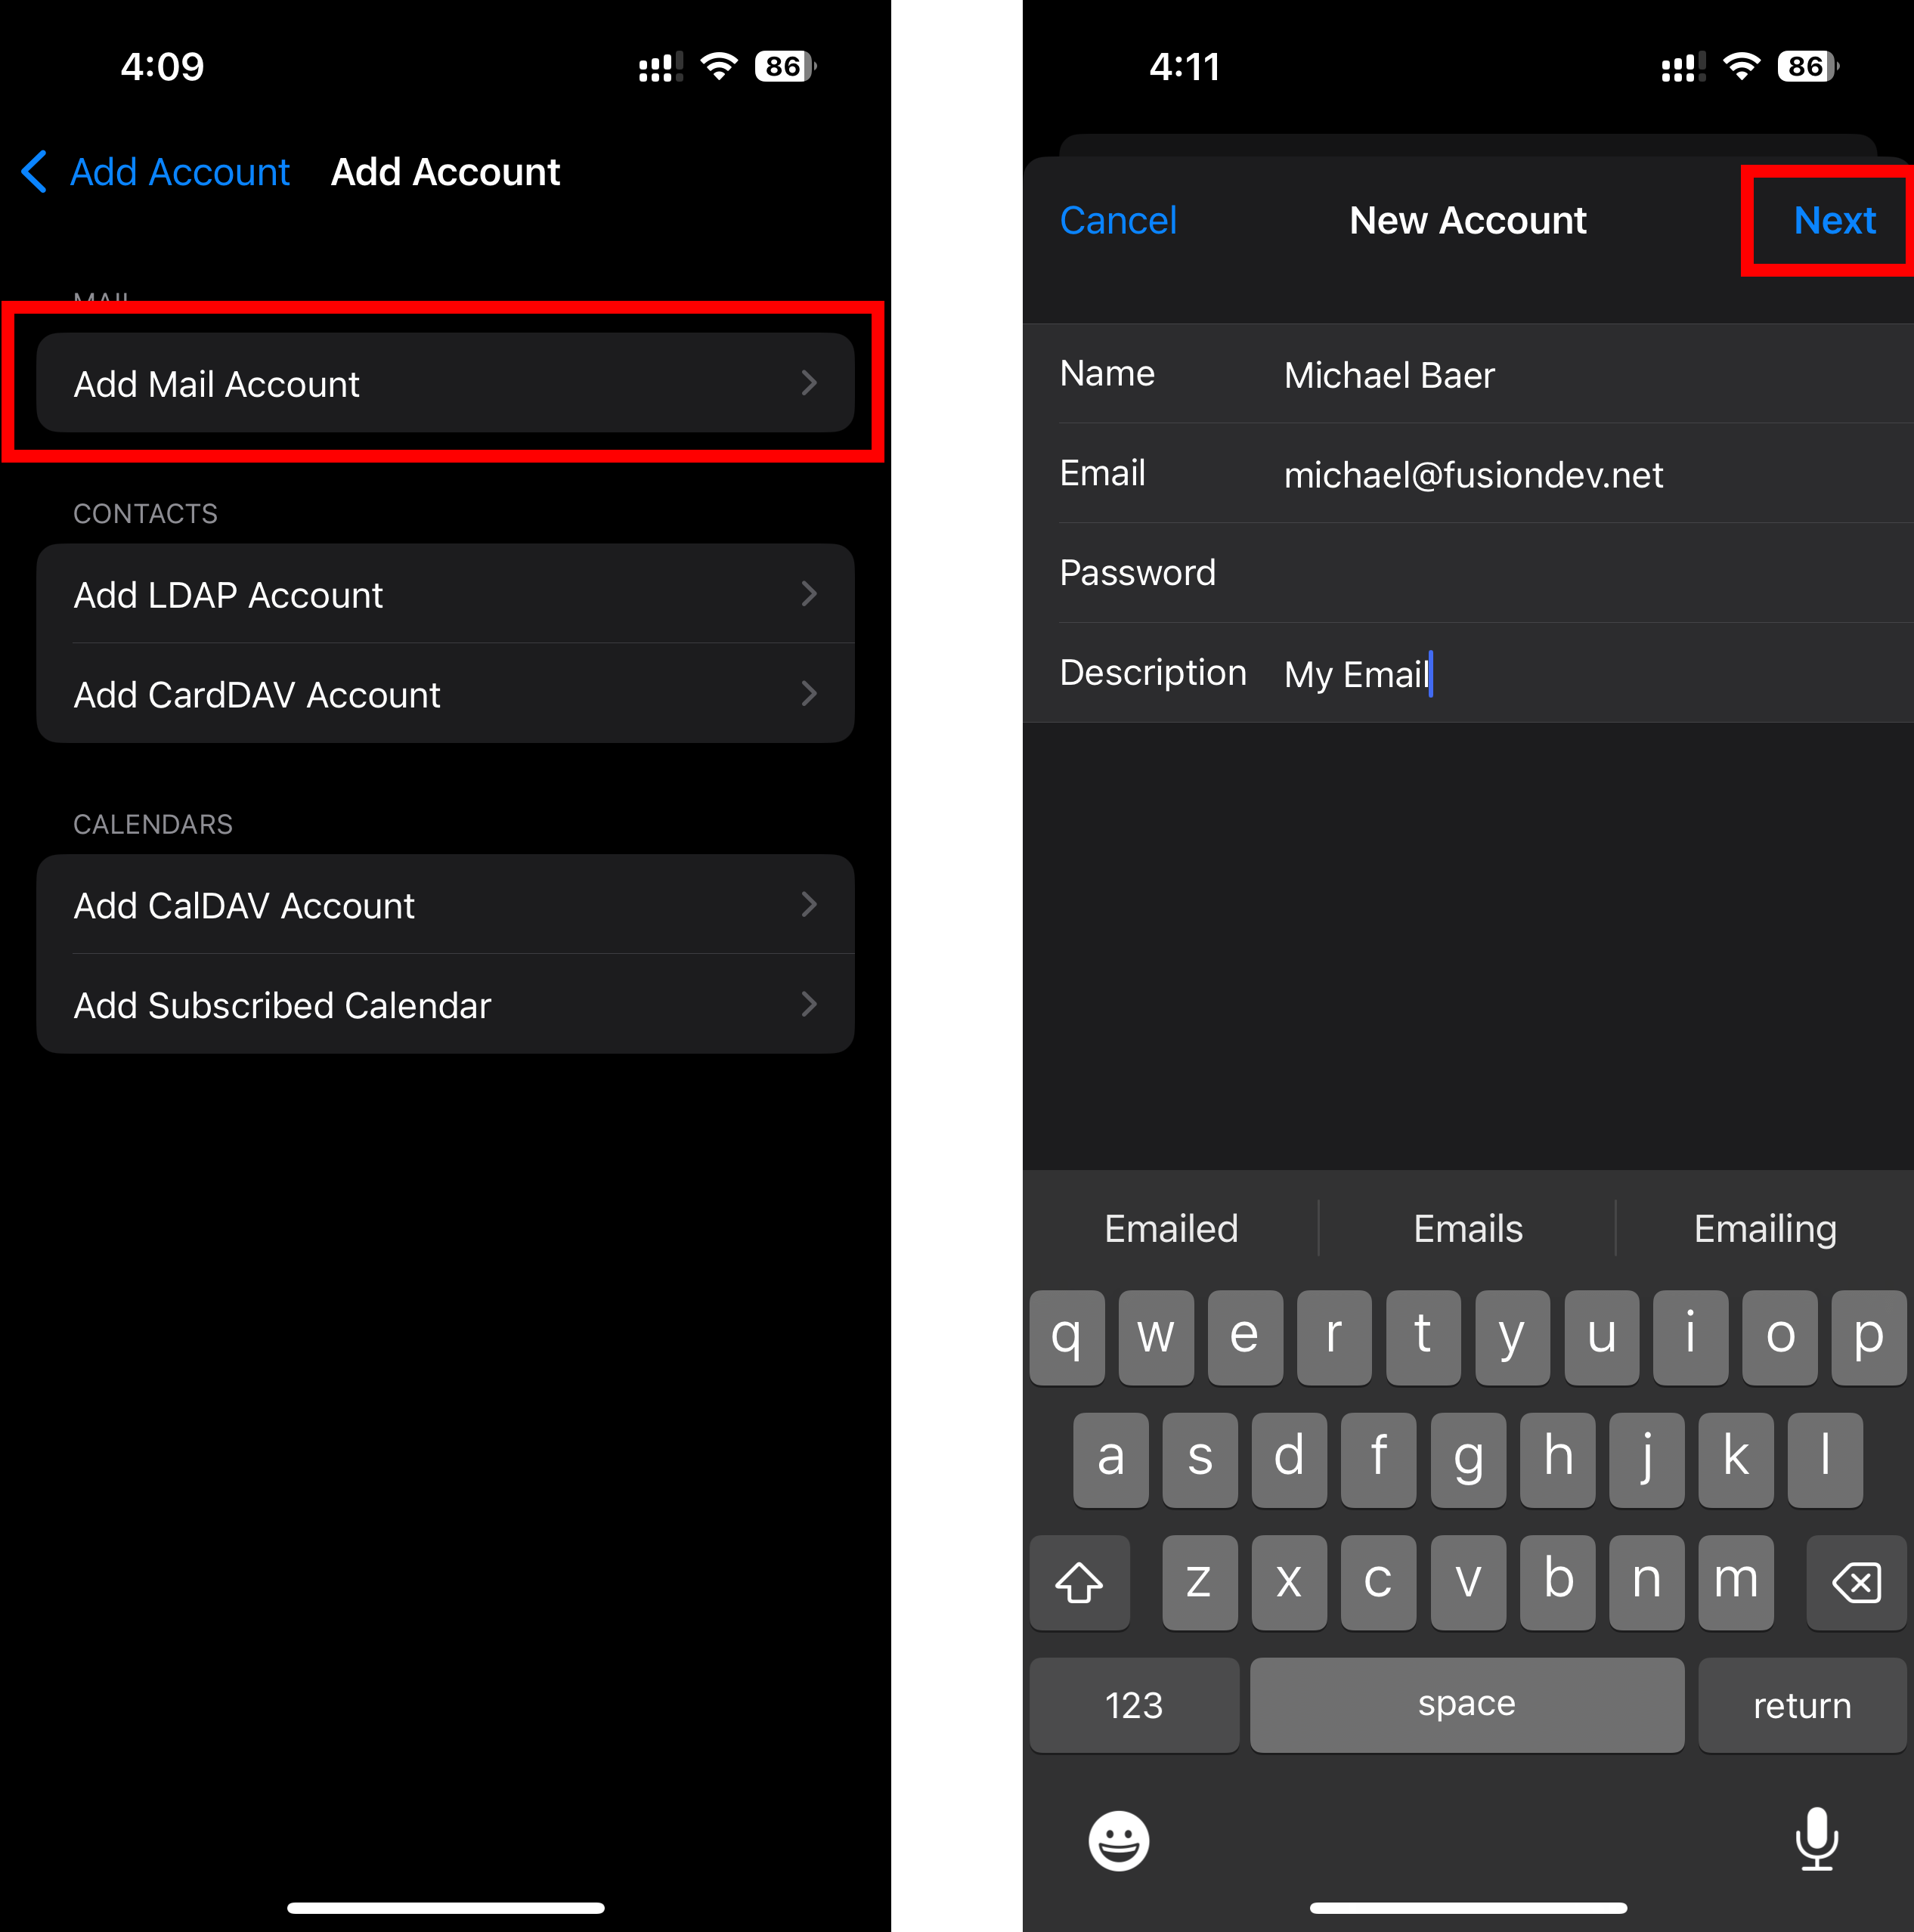
6. Fill out the “New Account” form with the following credentials :
Name – Your first and last name.
Email – Your email address.
Password – Use the password given to you by Fusion-Dev.
Description – A name to identify this account (ex. My Email)
7. Click “Next”
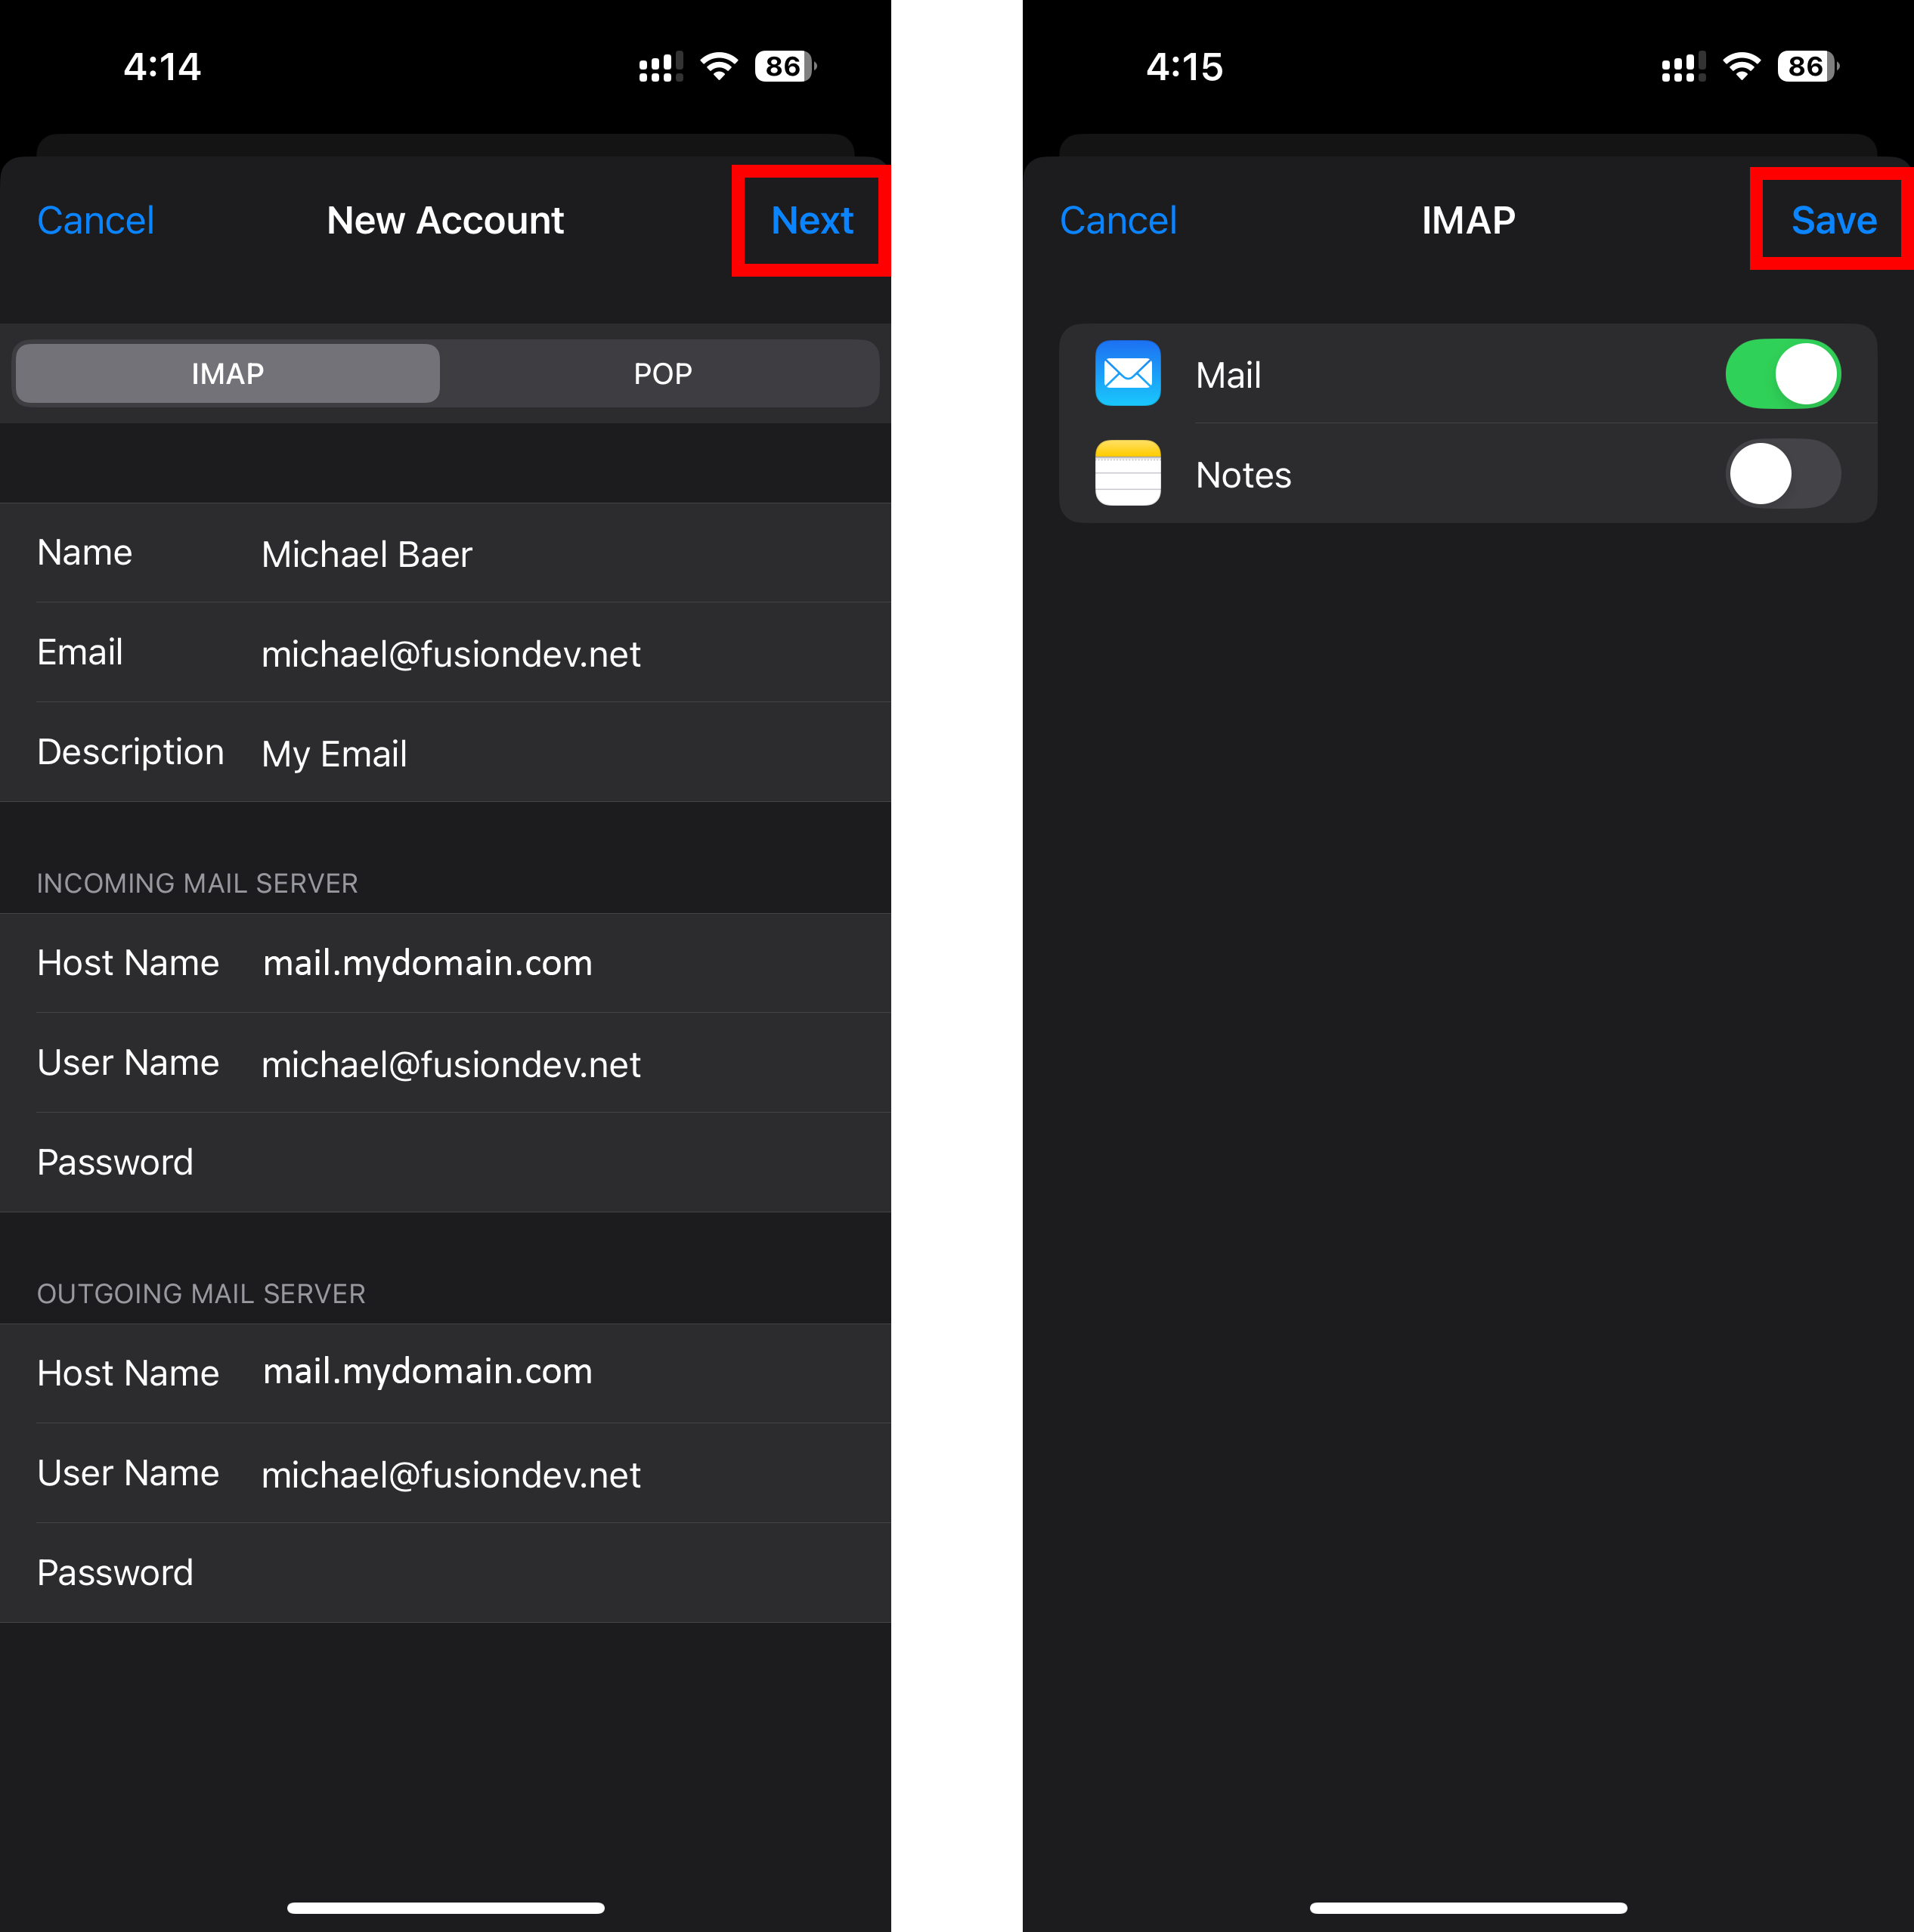
8. Fill out the “New Account” form with the following credentials and make sure “IMAP” is selected at the top :
Name – Your first and last name.
Email – Your email address.
Description – A name to identify this account (ex. My Email)
Incoming Mail Server
Host Name – mail.yourdomain.com (be sure to use your own domain for this field. For example if your domain is apple.com then you would use “mail.apple.com” as your server address. Make sure “mail” is at the beginning.
Username – Your email address
Password – Use the password given to you by Fusion-Dev.
Outgoing Mail Server
Host Name – mail.yourdomain.com (Same as above)
Username – Your email address
Password – Use the password given to you by Fusion-Dev.
9. Click “Next“
Note* This can take some time to validate so be patient.
10. Choose your options and click “Save“
Your NOT done yet!
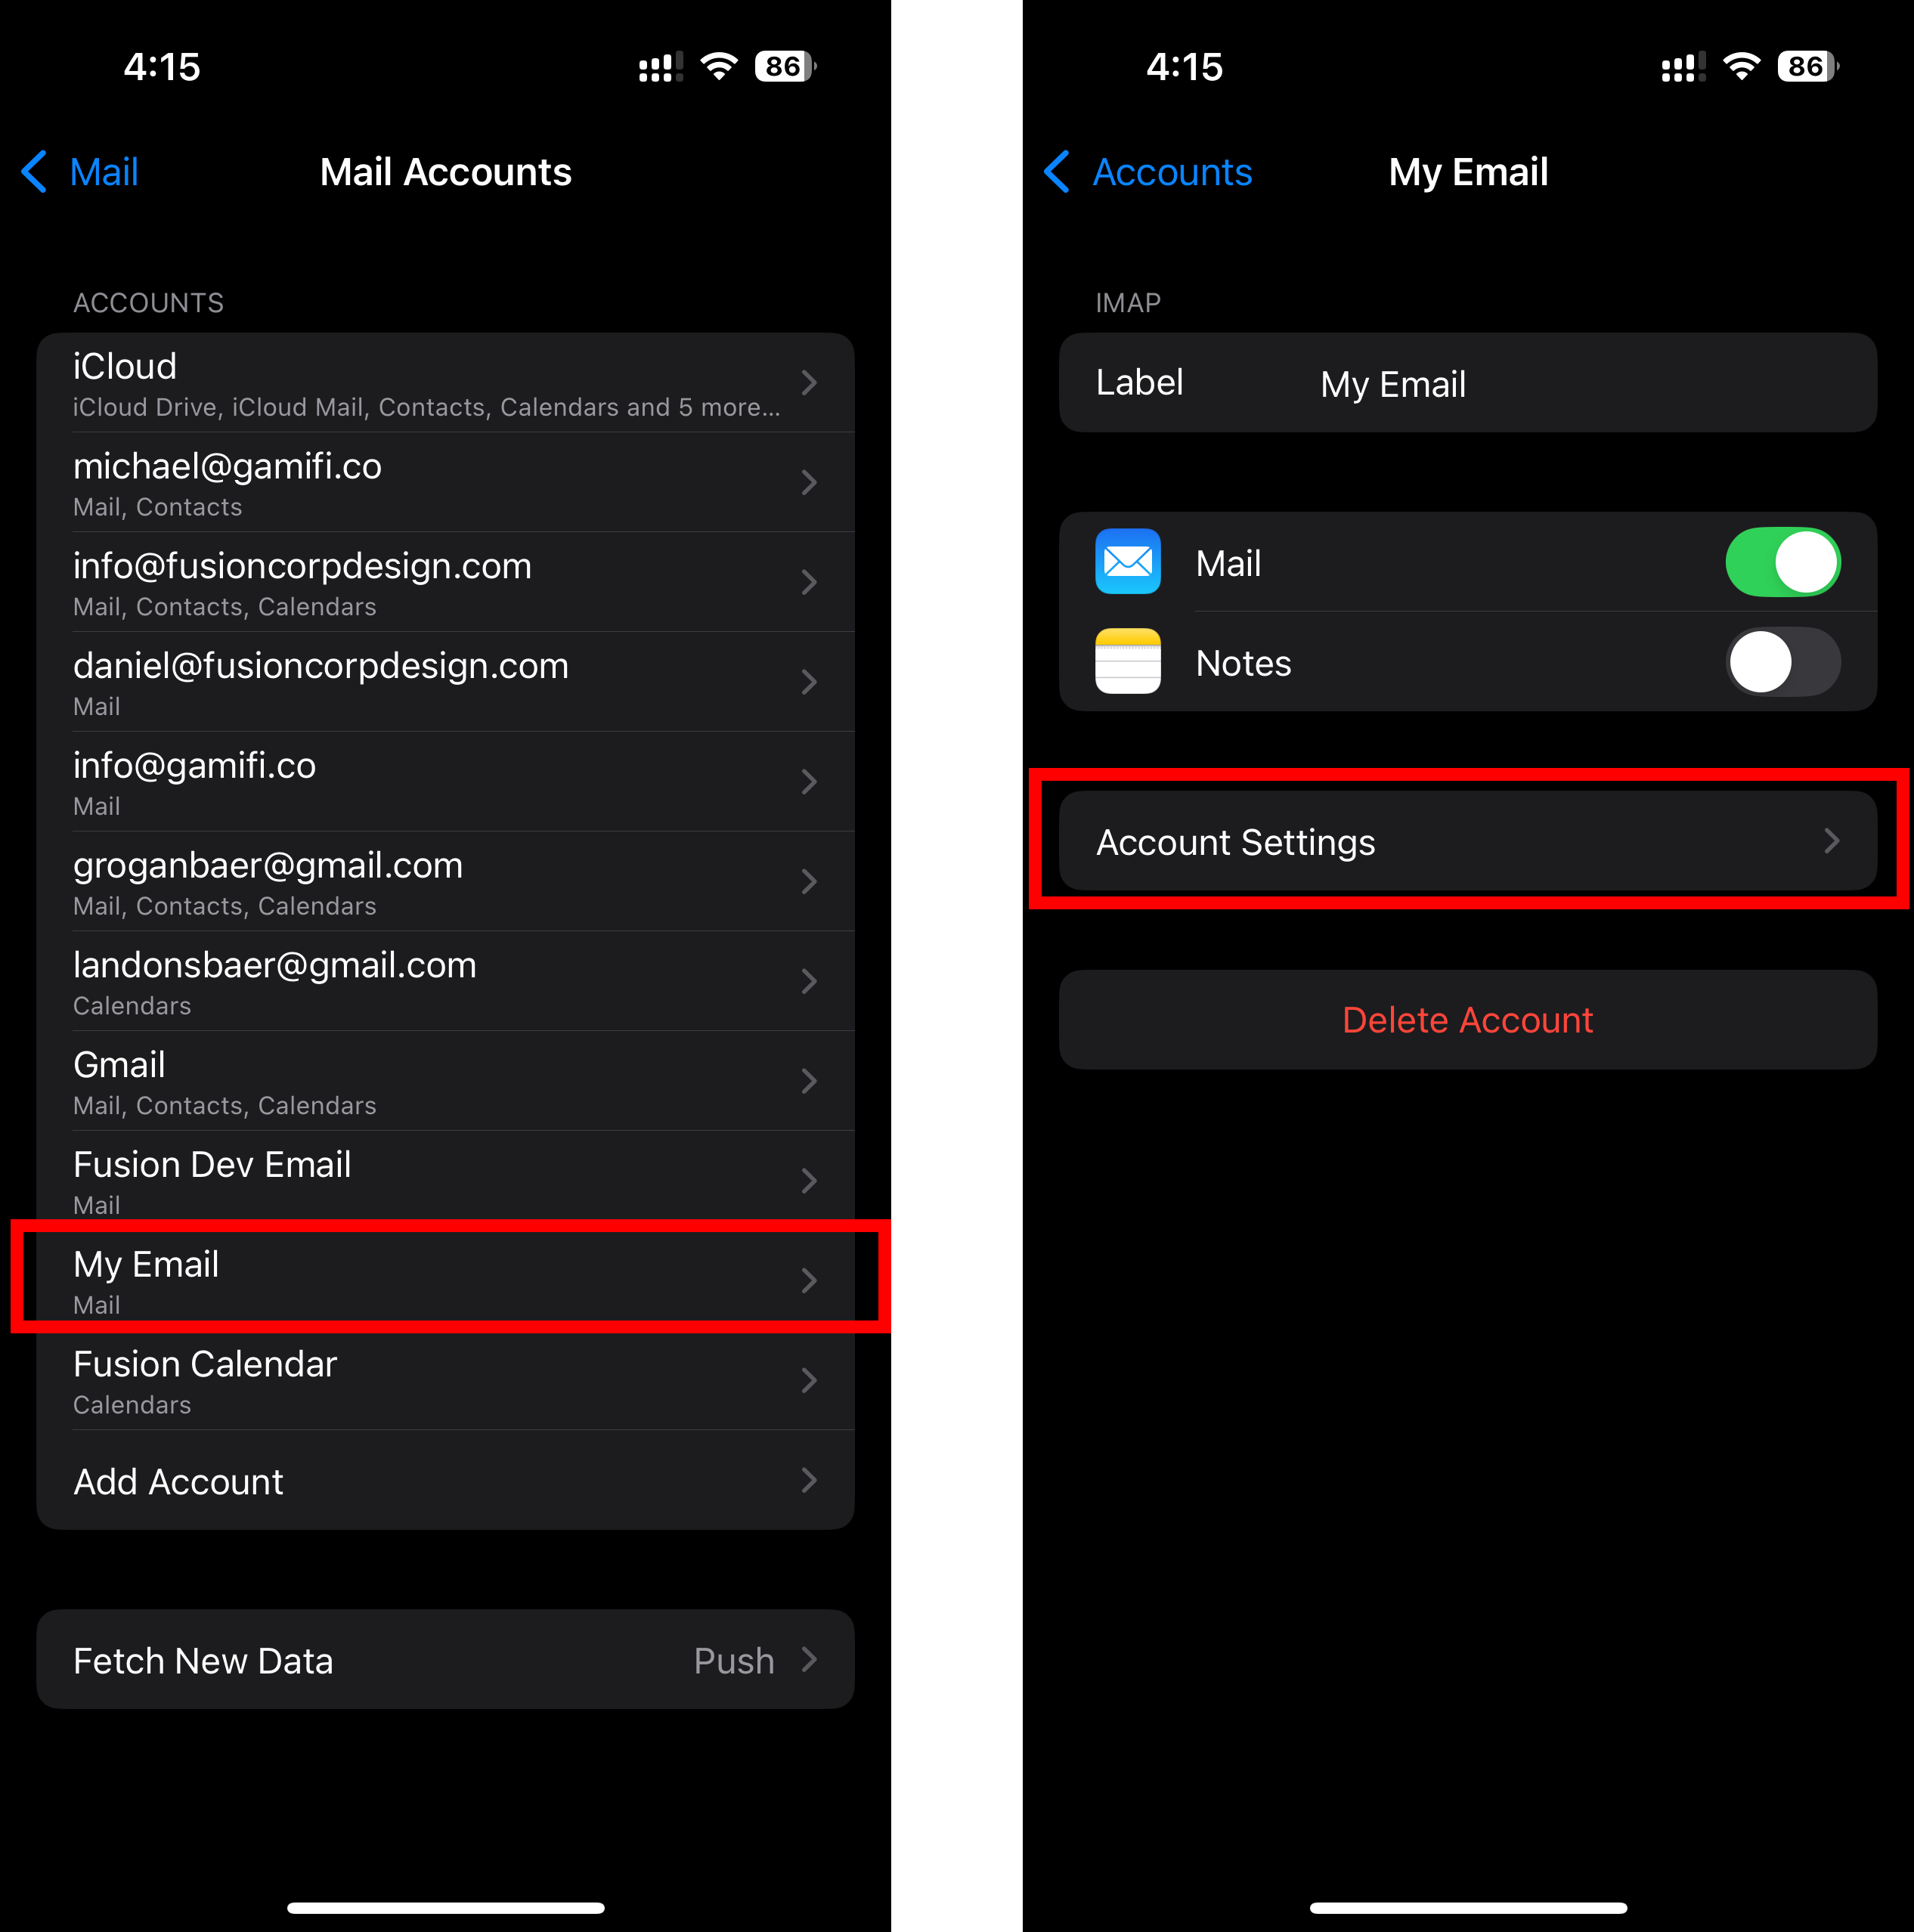
11. Go back to “Accounts”
12. Click the account you just set up. In my case I named it “My Email” so I will choose that account.
13. Choose “Account Settings”.
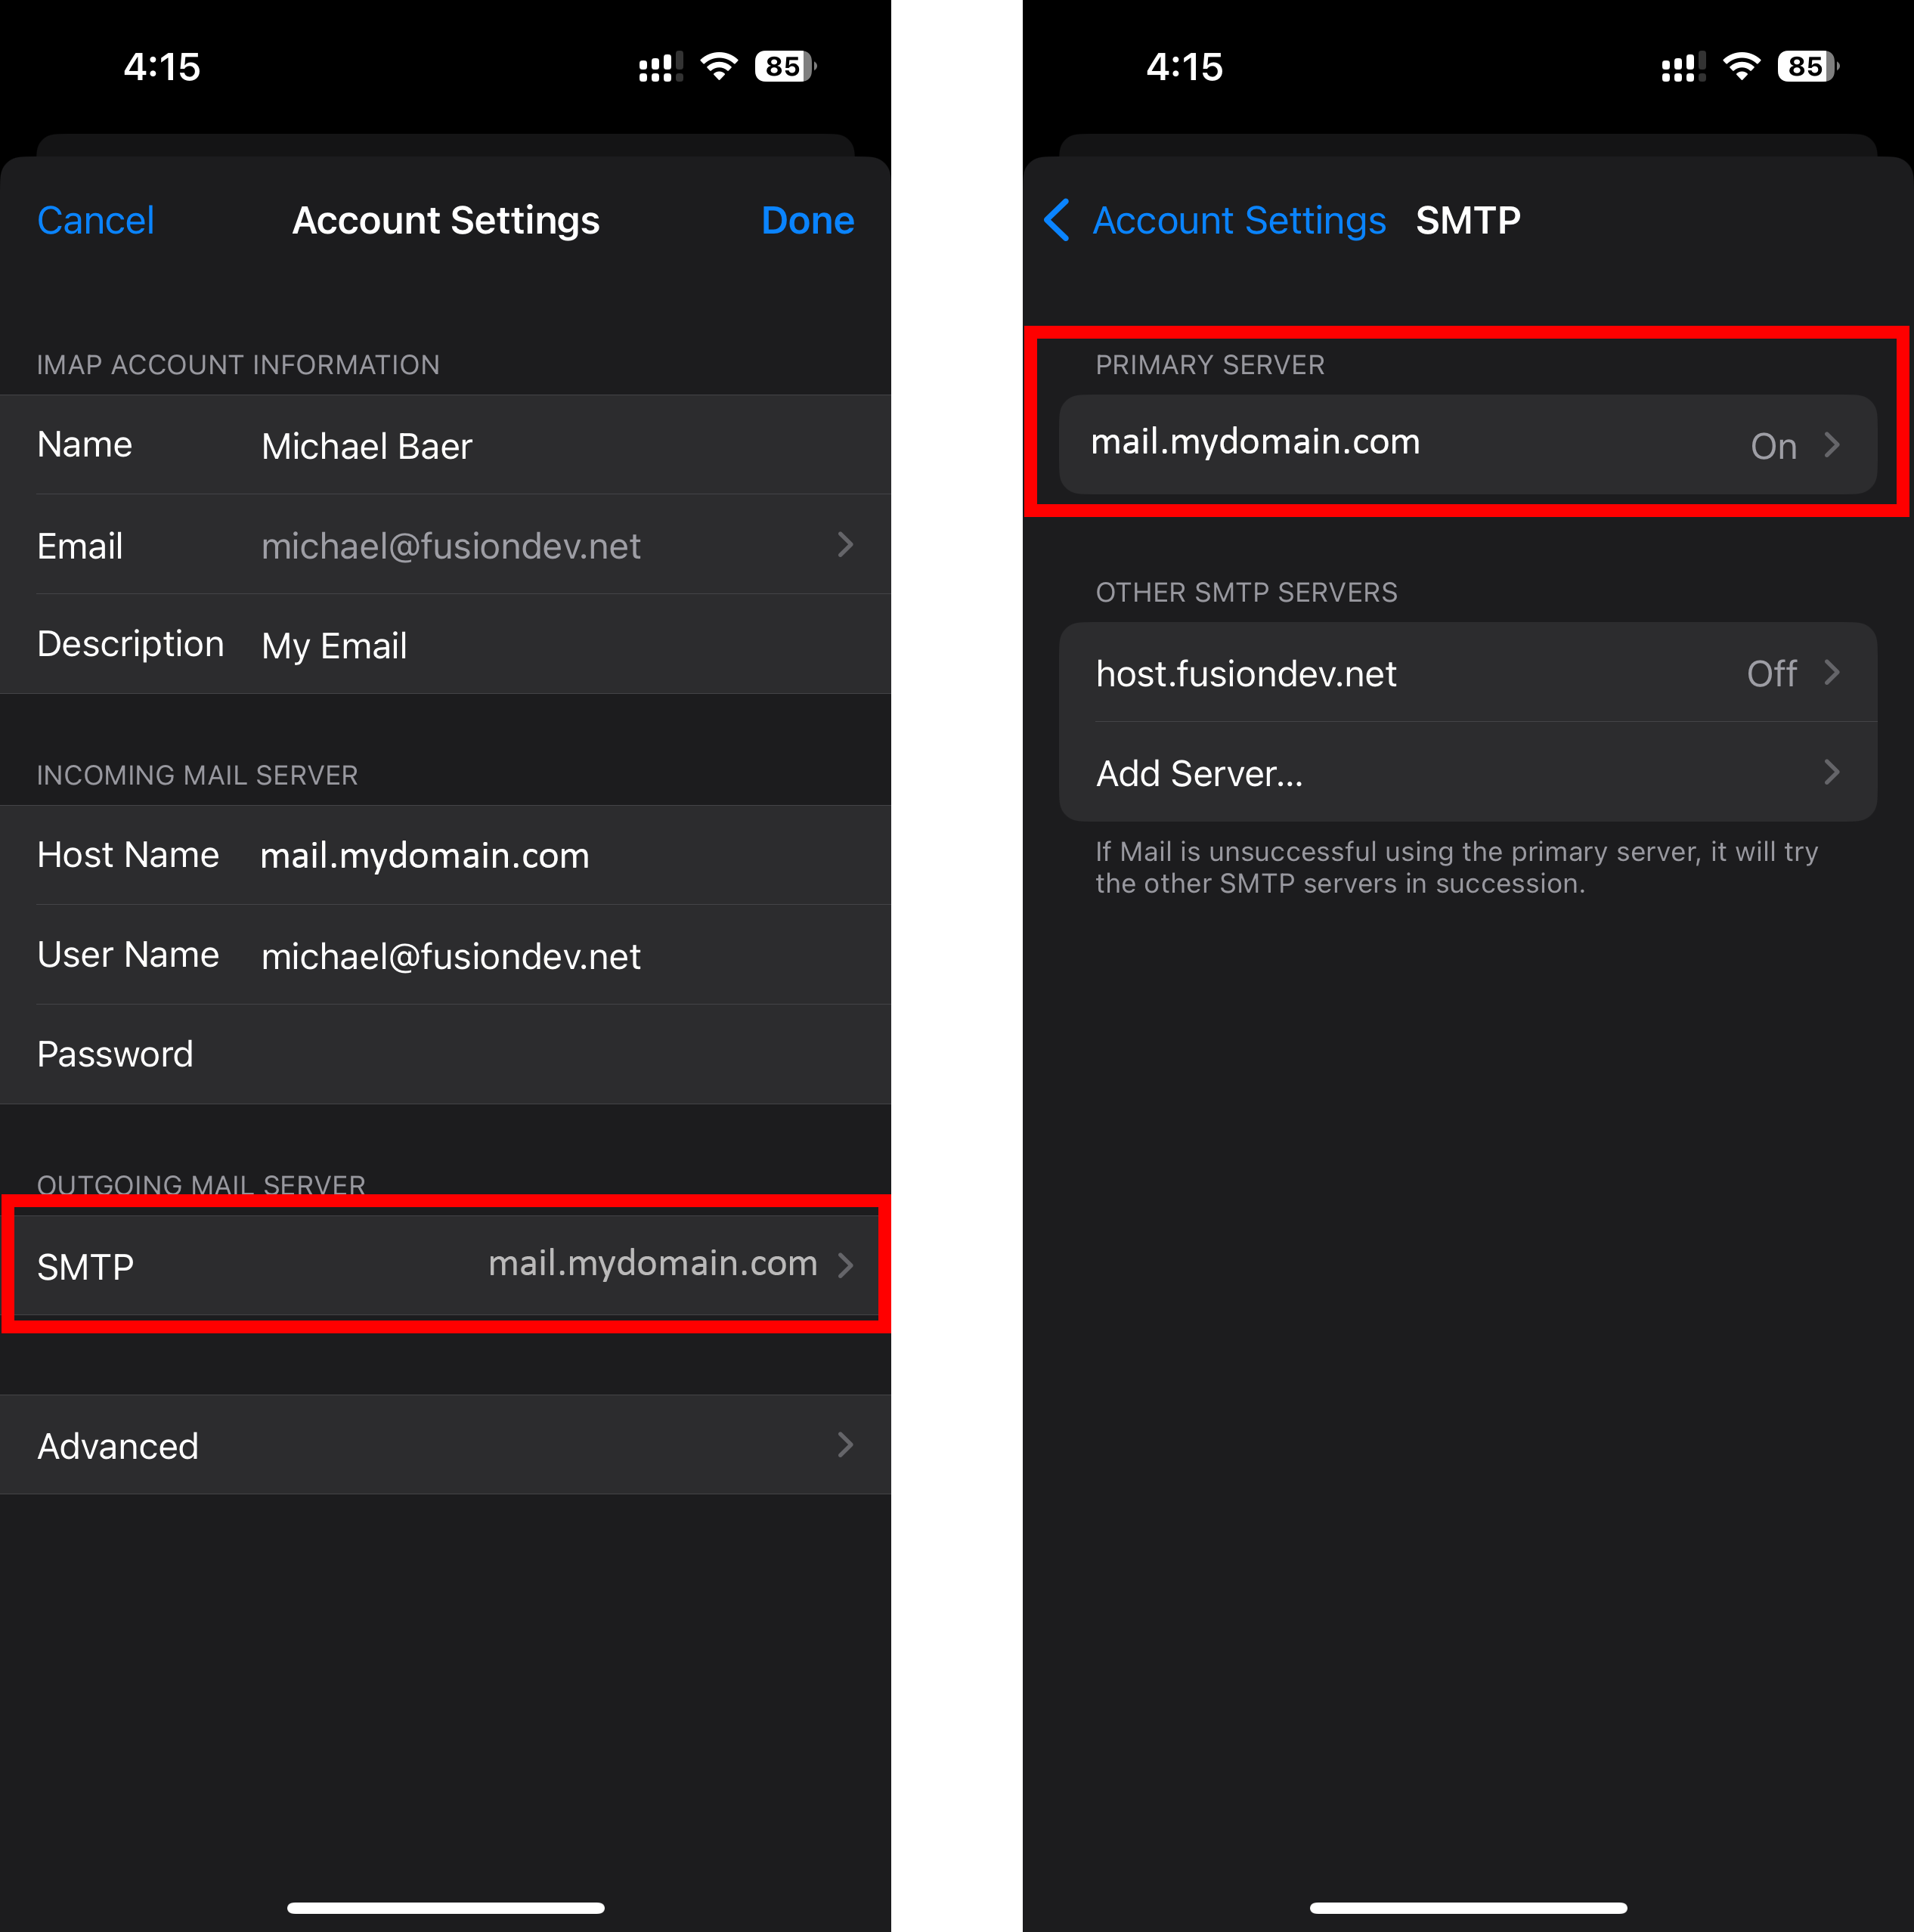
14. At the bottom choose “SMTP” under “OUTGOING MAIL SERVER”
15. Choose “mail.yourdomain.com” under “Primary Server”.
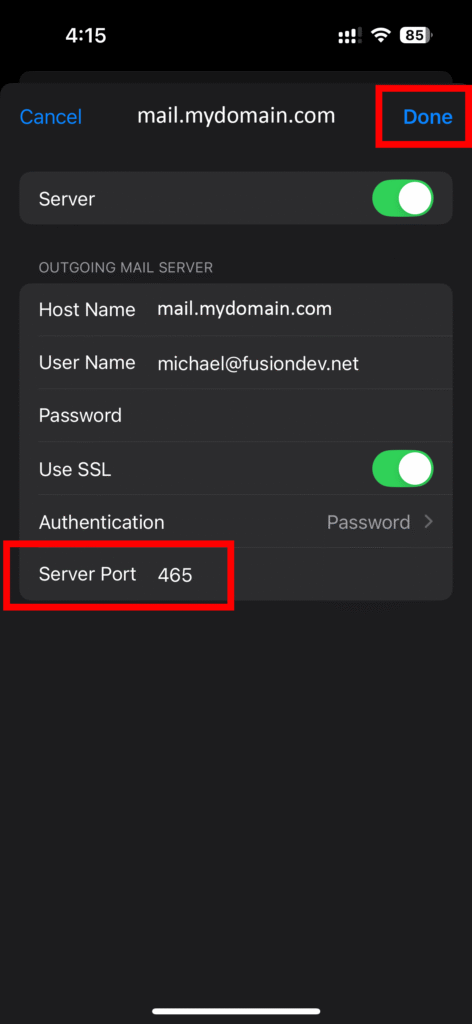
16. At the bottom make sure to change the port to 465 and that SSL is checked (Green).
Use SSL – YES (Should be Green)
Authentication – “Password”
Server Port – 465
17. Click “Done”
Note* This can take some time to validate so be patient.
18. That’s it, your done!